More relevant to any eCommerce business owner, and something that is missing from most e-commerce platforms and online stores is the ability for a seller to have product tagging for their products. As an example, let’s say that you have an online store that sells a wide variety of products. Typically products will be assigned to categories, and will also be searchable via product names or descriptions. Now imagine being able to tag each product on your site with two or three relevant keywords that can then be used as another vector for cross-referencing products. When a customer is viewing one product, they could click on one of its tags to see a list of other products with the same tag. With the help of tags even if your products are categorized differently you can view them all together under the same tags.
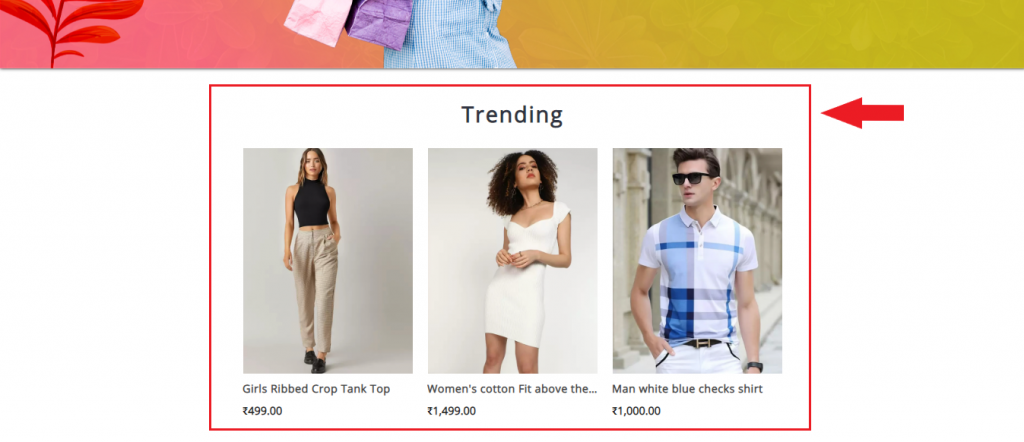
MoreCustomersApp brings you this most relevant feature to display Product Tags right on your online store’s HomePage. Imagine a condition where you have a deadstock lying in your store and you want to give it away at 80%OFF. You can easily add a Tag to all those products and show it to your customers on the website’s landing page.
Product Tagging is Free with all MCA PLANS!!! UPGRADE NOW
Let us understand the Step-By-Step Process of Adding Tags to Products
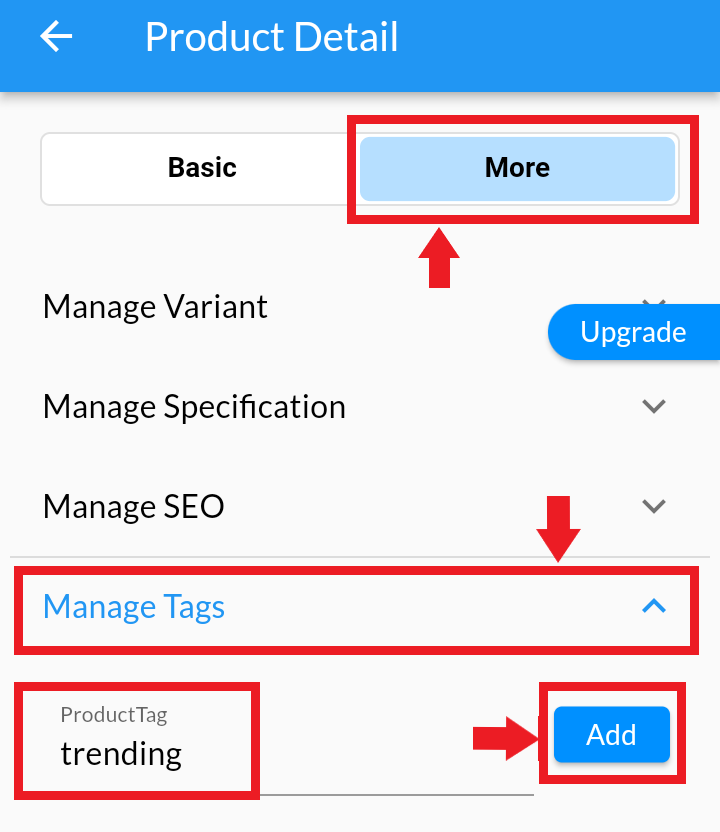
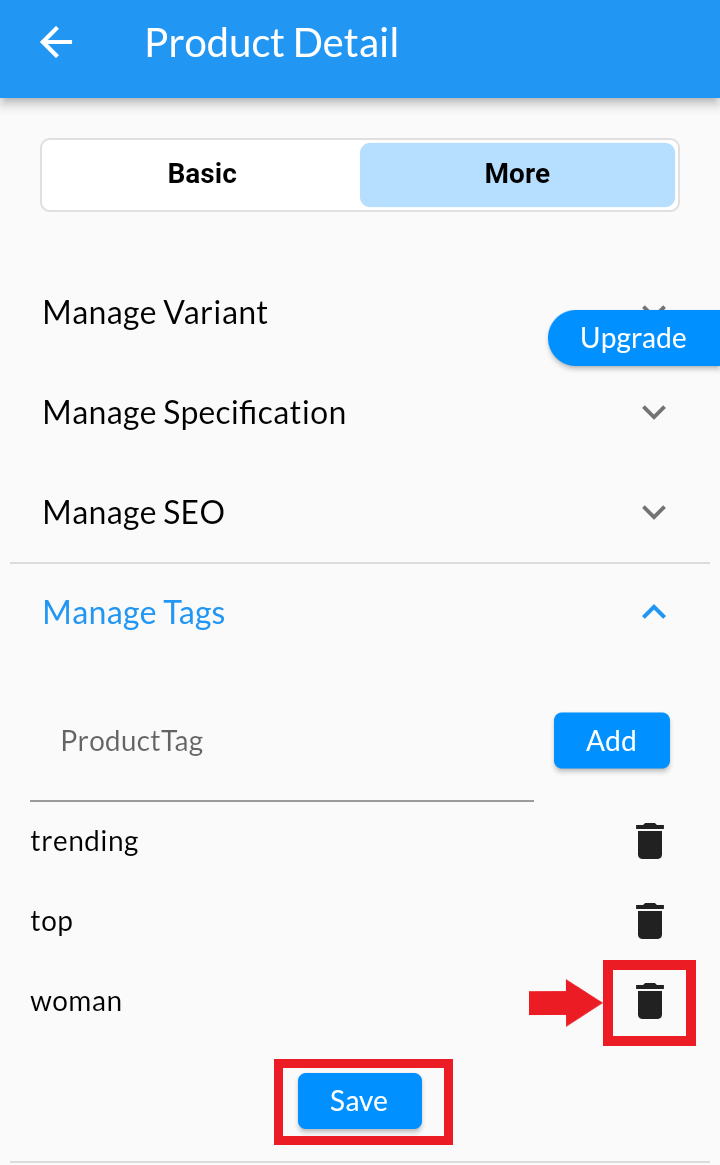
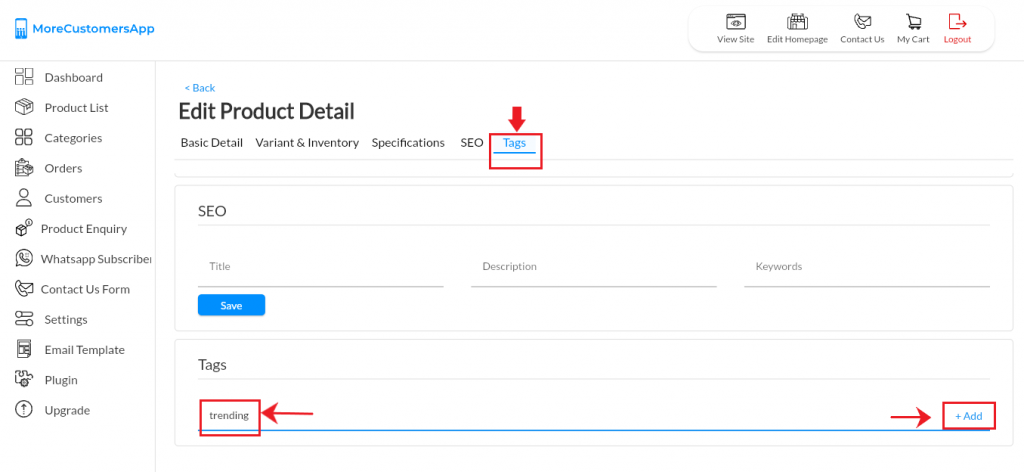
1. Login in to MCA Admin App 2. Click on 3. Select the product you want to add Tags. 4. Click on More and select Manage Tags. 5. Add a tag and click on Add button (ex: trending) 6. View the added tag in the list below. You can add this tag (ex: trending) on all those products that is related to your tag. 7. To delete a tag click on Delete icon and click on Save. (Note: You can't edit a tag. Simply delete and Add New) Android
![]() , and select Products
, and select Products 

Learn How to Display Tagged products on Homepage here


