
Learn How to manage orders from your website from MoreCustomersApp Panel. Earlier you learnt How to Get Notified about New Order and What Details are provided in Orders.
Searching and Filtering Orders #
Desktop
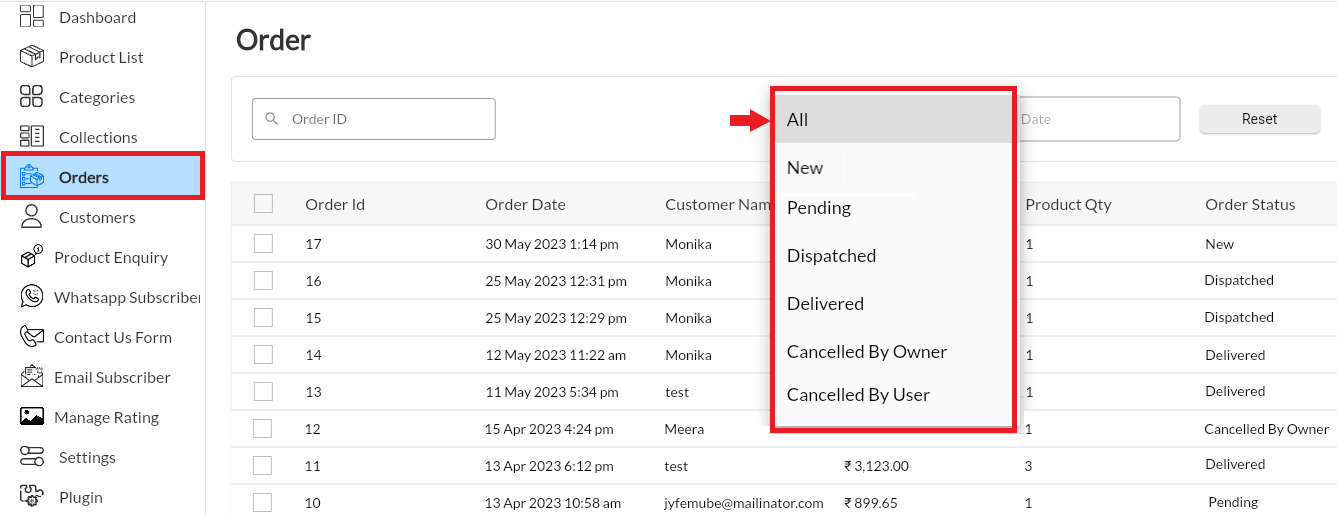
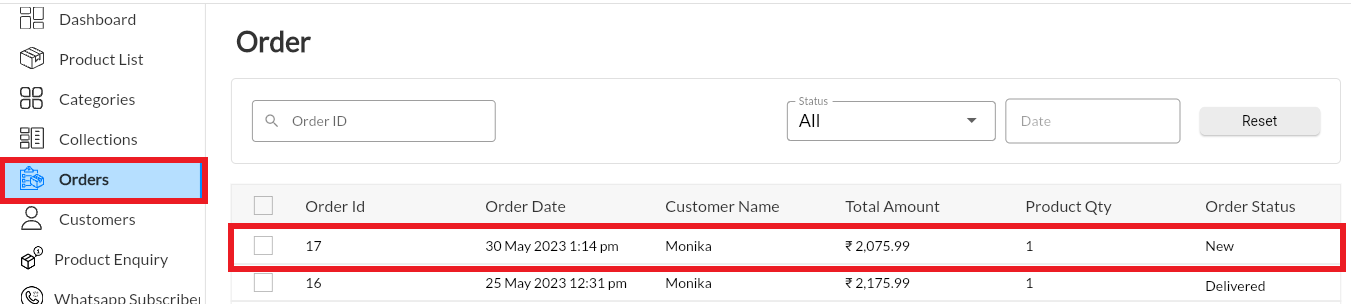
1. From your MoreCustomersApp admin panel, select Orders.
2. You can see the list of your received orders.
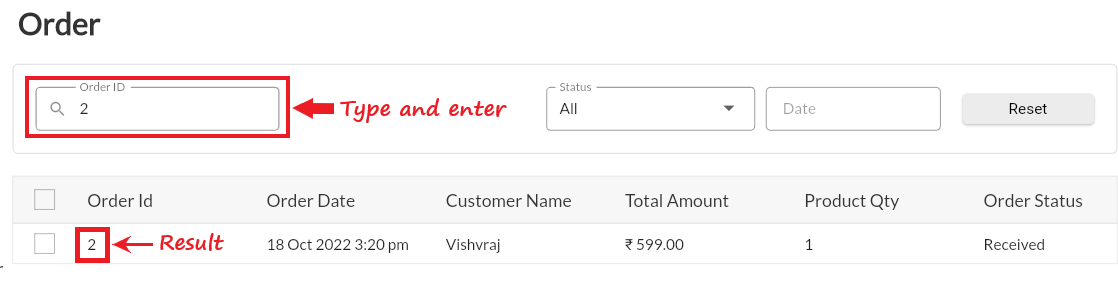
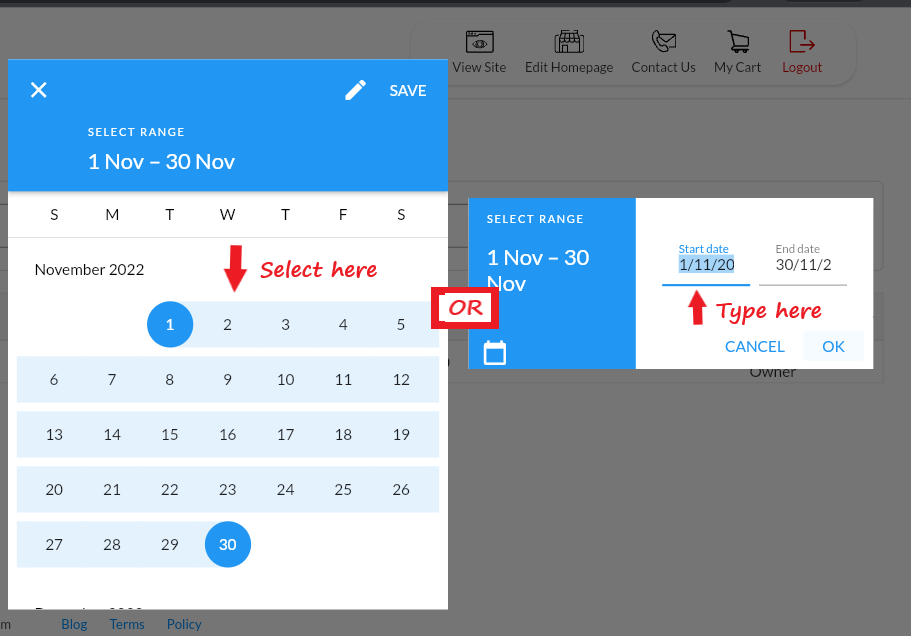
3. Search any order by Order ID, Date and status.
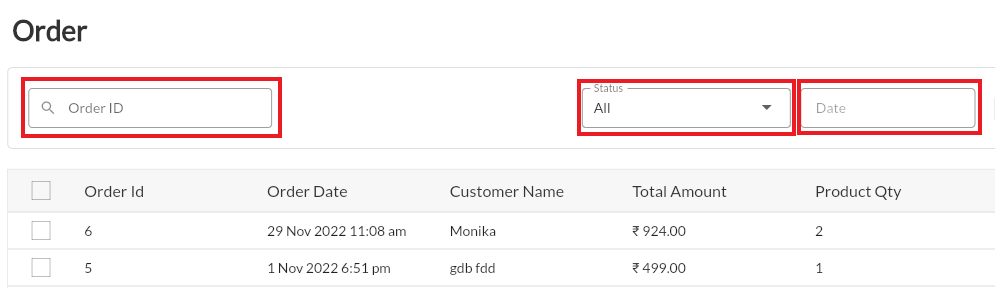
a. Order ID
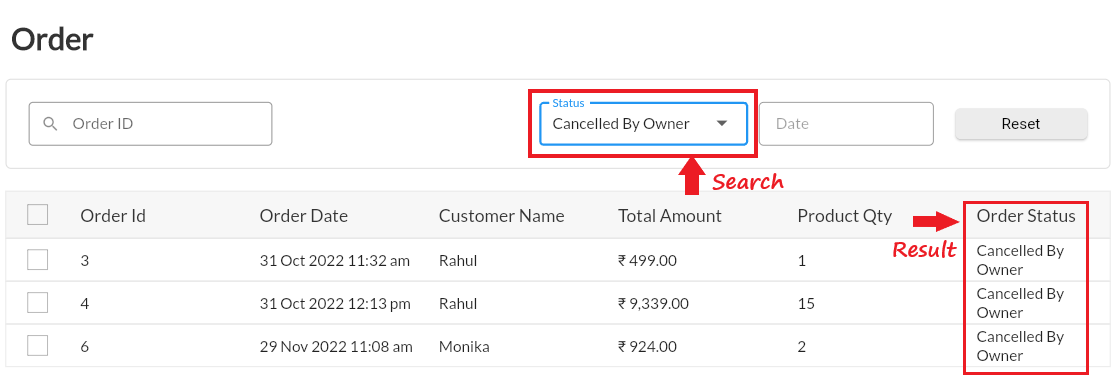
b. Status
c. Date
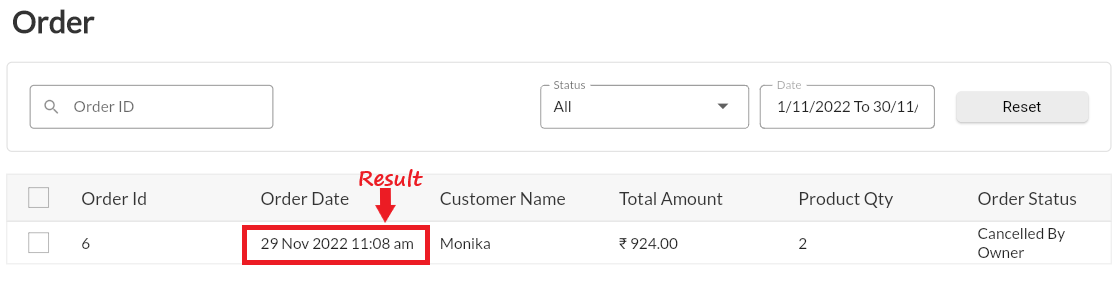
4. You can Reset and Search again.
Editing Orders #
Desktop
1. Login into your MoreCustomersApp Admin panel
2. Go to Orders and Select the Order you want to Edit
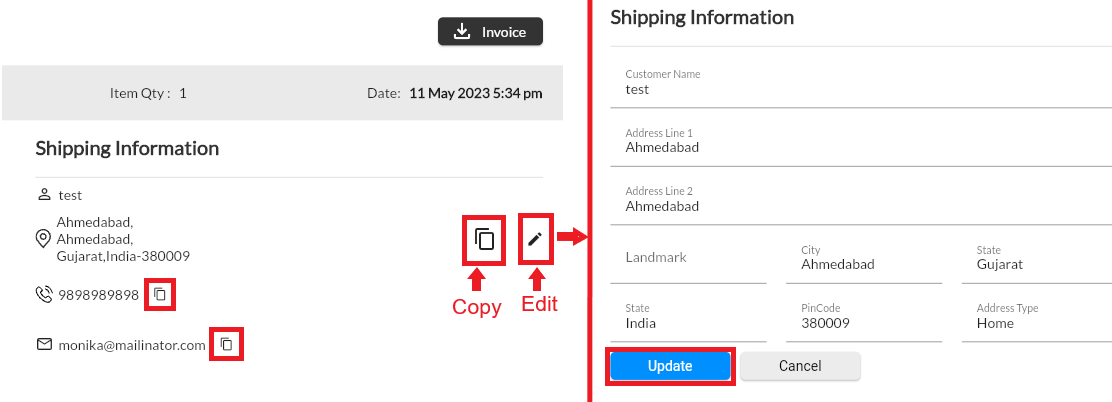
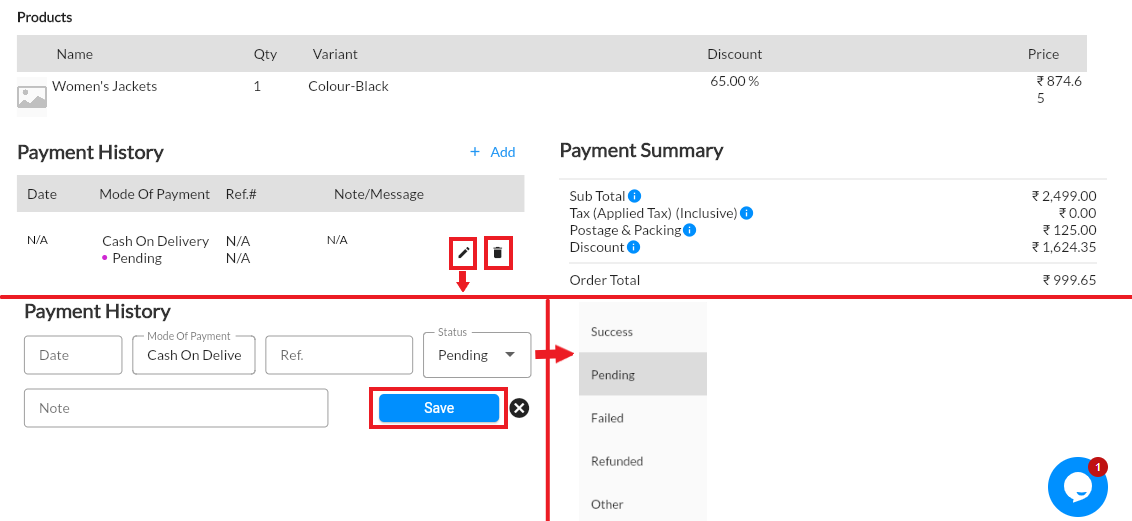
3. In Order Details, you can edit Name, Address and Payments
4. To Edit Name and Address, click on edit icon. Make the changes and click on Update button
5. MCA allows to Add/Edit payments for orders, that store owners want to add manually. They can also change the status of payments. This type of arrangement is needed in generally B2B businesses.
Changing Order Status #
1. Go to MoreCustomersApp Admin Web/Admin panel
2. Go to Order List and Select the Order you want to change status
Note: By Default you will sell All Orders in List page. Use Filter Option to Search orders by Status
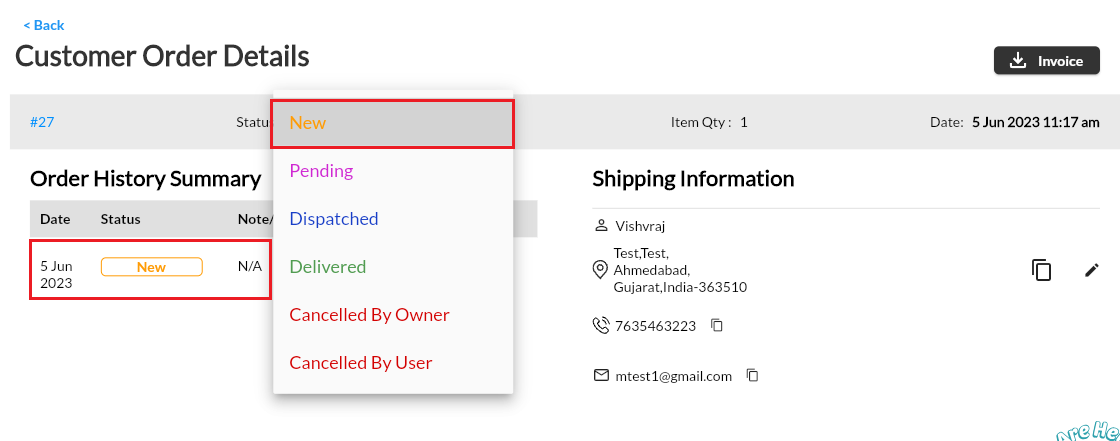
3. In Order Detail Page,click on Status to change the Status. Note: When an order is placed it has New Status
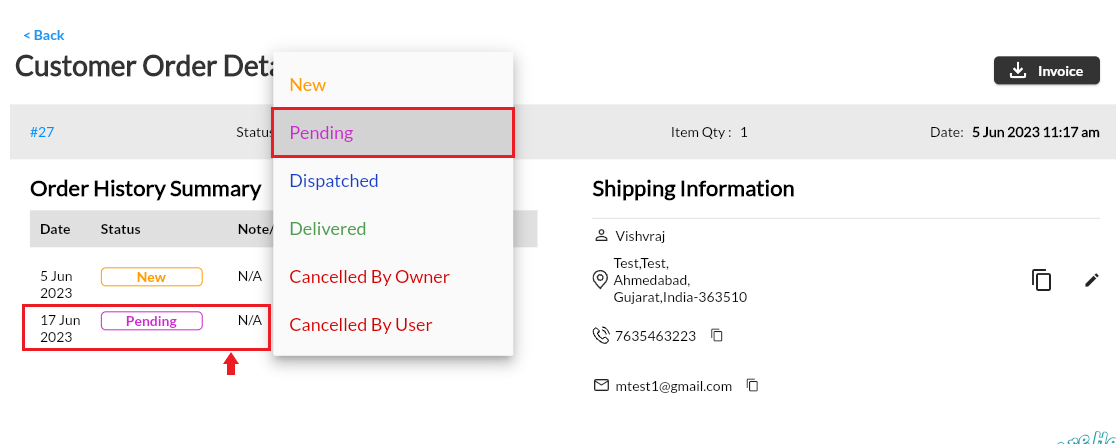
4. Store owner can change the status to pending, until he hasn’t dispatched the order. Check the changed status in Order History Summary
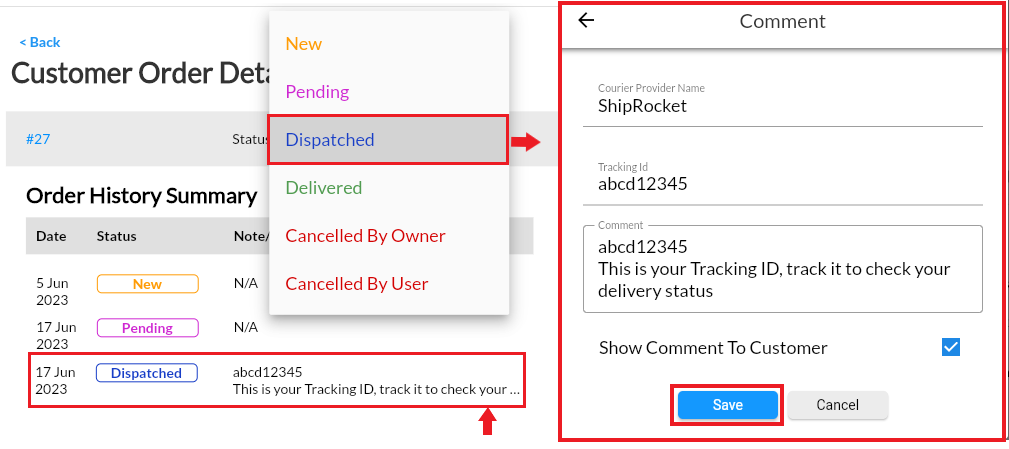
5. After the order is packed, seller will Dispatch the order with proper notes of tracking that order. He can also share the same with his customer
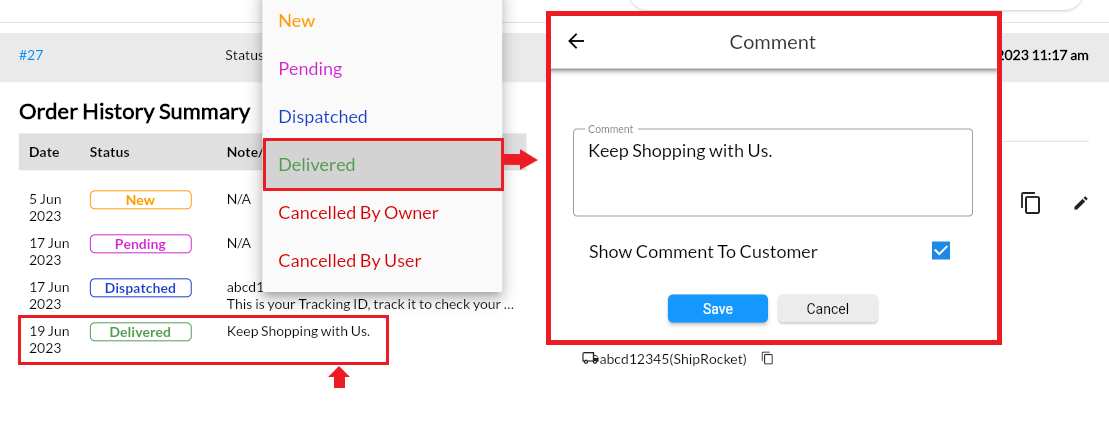
6. Once delivered change the status to Delivered.
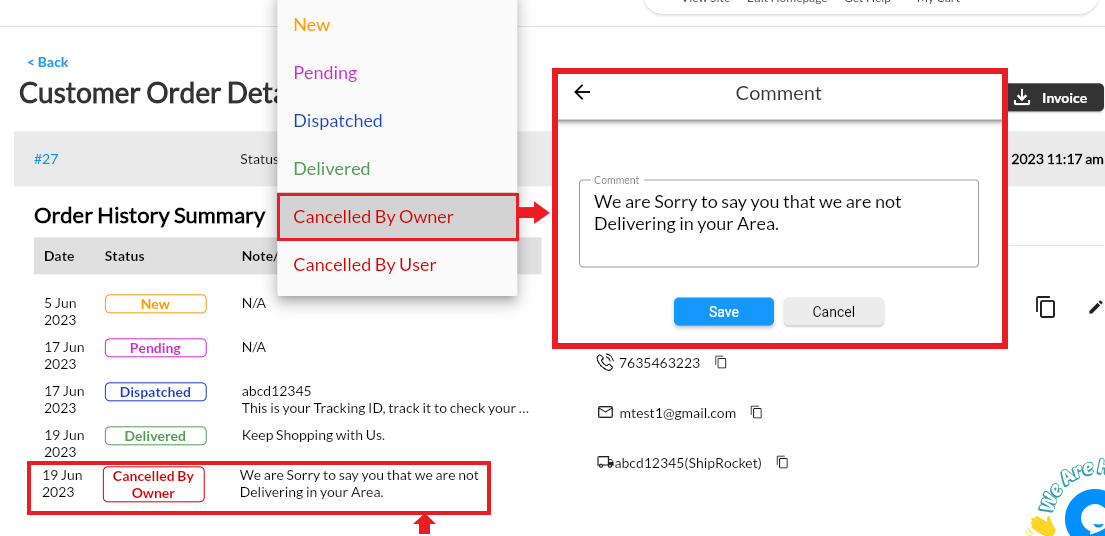
7. If for any reason, store owner want to cancel the order, he can do so by changing the status to Cancelled by Owner and he can put a note to show that to buyer.
8. If buyer cancels the order his order status changes to Cancelled by User automatically by the system.
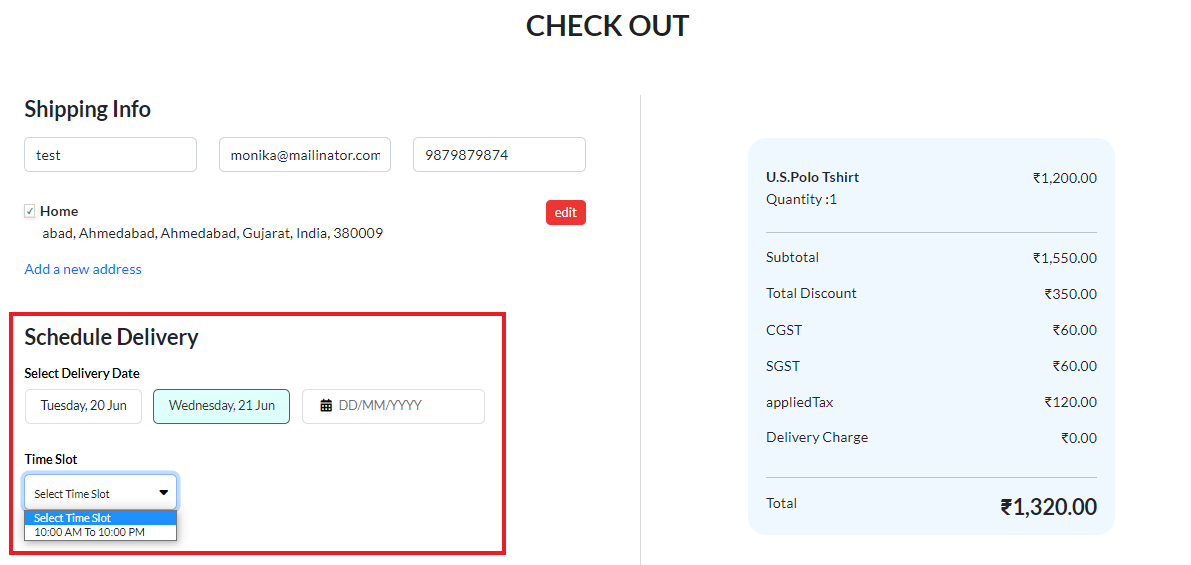
Schedule Delivery of Order #
1. After the Schedule Delivery Plugin is Purchased and Enabled by Store Owner, his Site visitors can easily scheduled their orders on CheckOut page.
Download Invoice #
1. Go to MoreCustomersApp Admin Web/App panel
2. Go to Order List and select the order you want to download the invoice.
3. In order details page, you will see icon for downloading the invoice
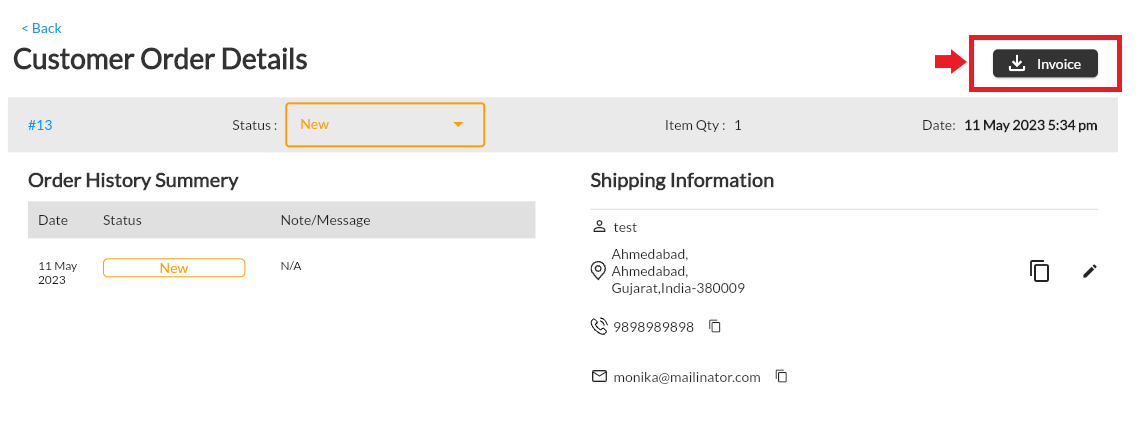
4. View the invoice and save on your machine.
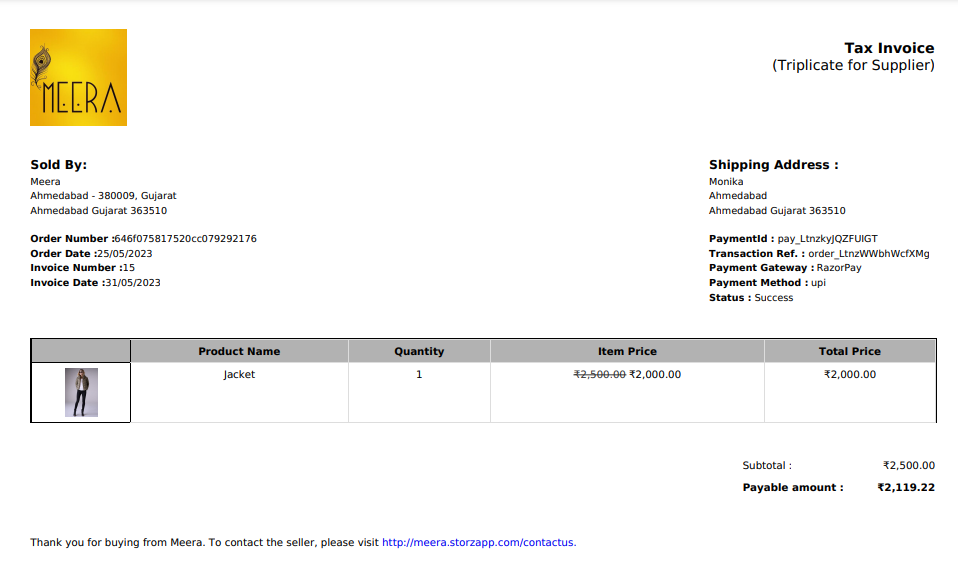
5. Invoice are sent to both Buyer and Seller on their email id. You can change the Invoice Template as per your business needs.


