
How to Set up RazorPay Payment option on your Store #
Razor Payment plugin is Not a Free Plugin so first purchase is mandatory. Or you can opt for higher plan, in which it is pre-installed
1. From your MoreCustomersApp admin panel, select Plugins

2. You can search plugin by name, or category.
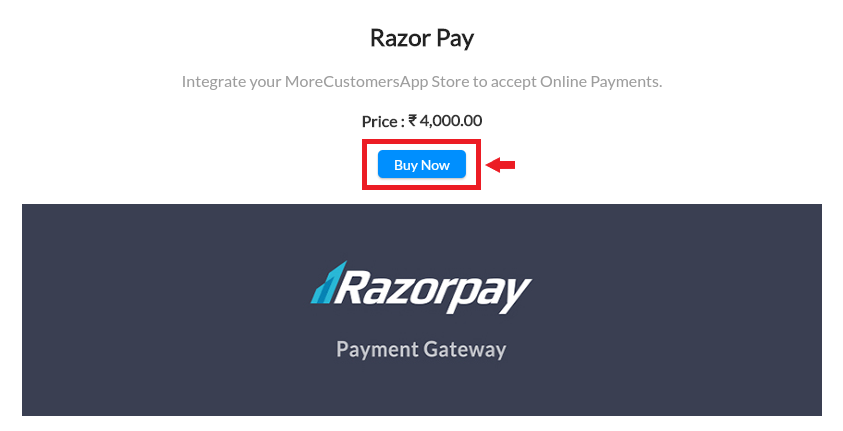
3. After select that plugin, click on Buy now. (Note: You must have account on Razor Pay.)
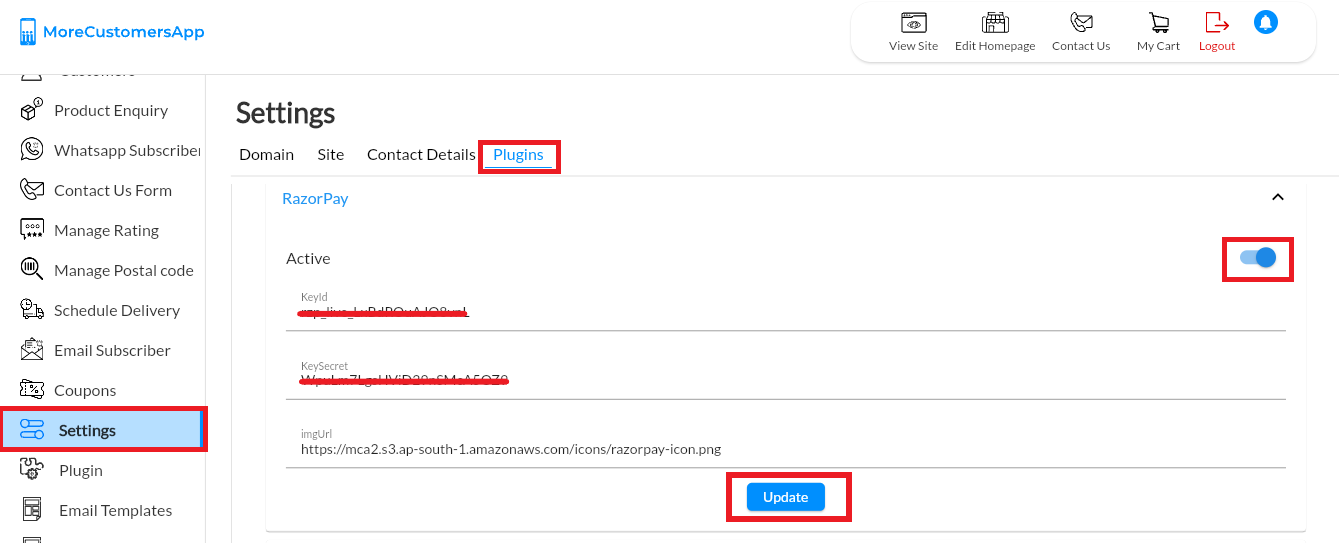
4. Now go to settings, click on Plugins, enable that plugin and Enter details of your account. Click on Update.
How to get RazorPay key and Id #
In order to collect payments online on your store, you need to first create an account in razorpay and then activate razorpay plugin from MoreCustomersApp.
1. First create an account in razorpay. Below help will guide you how to do so
Learn How to Setup RazorPay Account
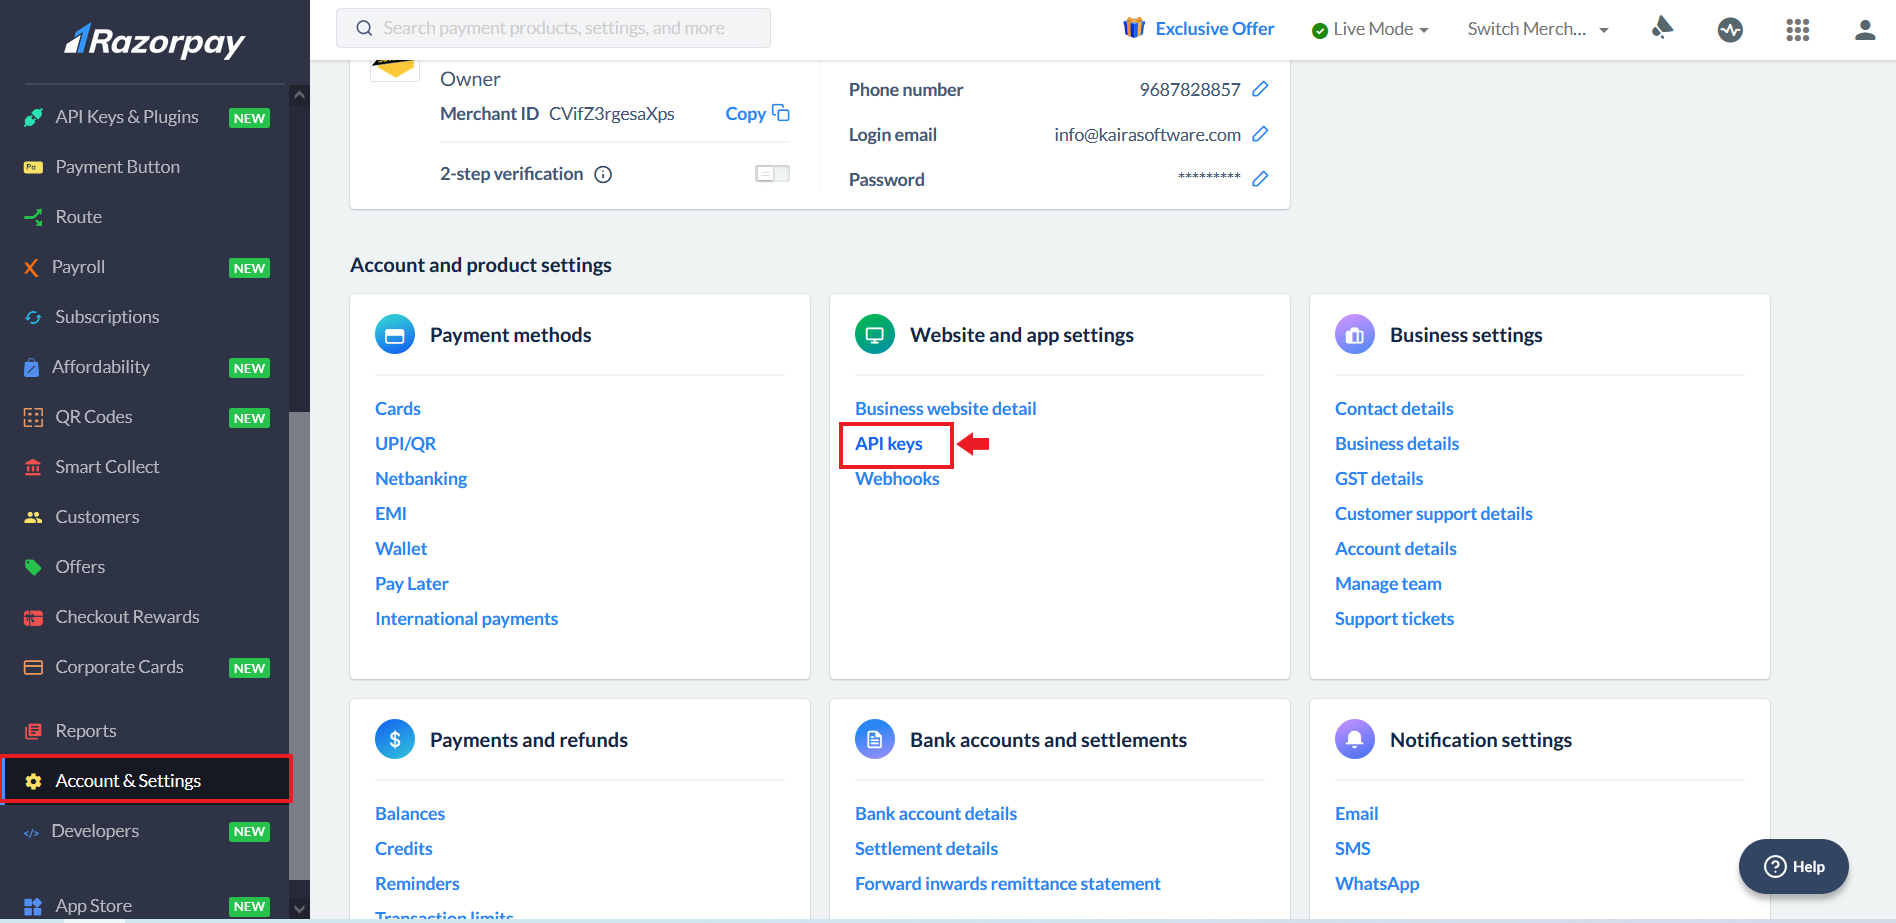
2. Login to your razor pay account and select Account and Settings.
3. Now select API keys.
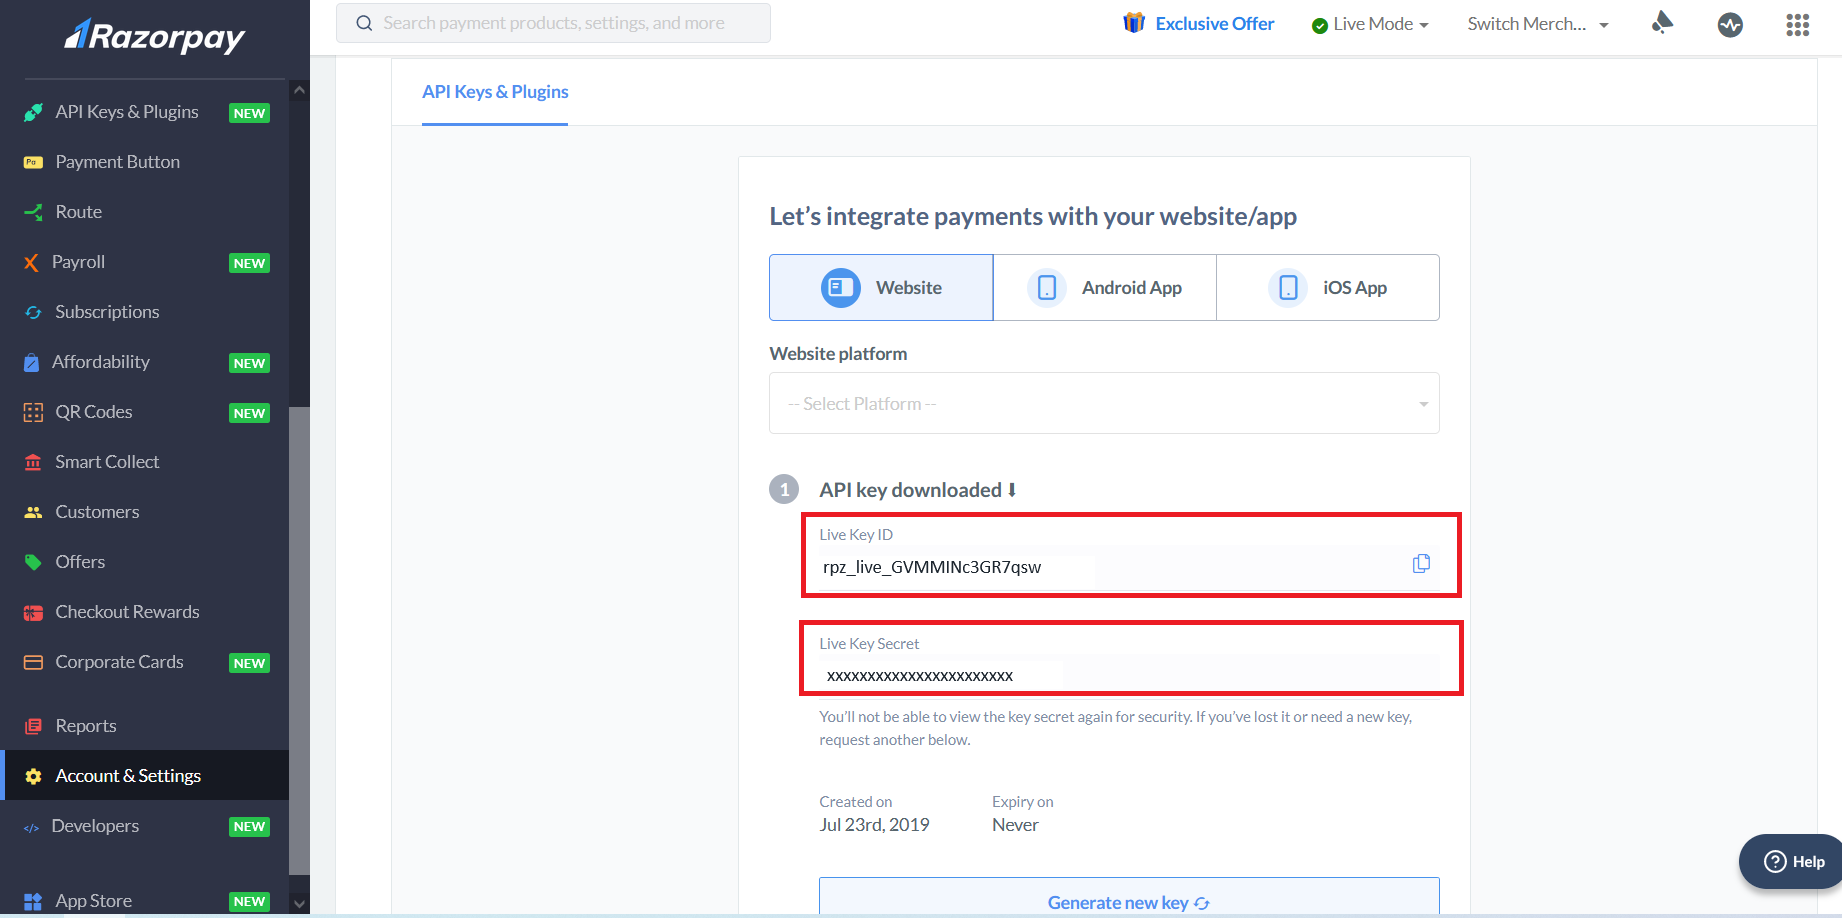
4. Here you can see your Key Id and Key Secret. You have to copy from here and then paste it over in Settings>Plugins>Razorpay from you MCA store admin.
How to View RazorPay Option on Store Front #
After you have integrate online payment solution in your store, it is time to test.
1. Go to your storefront, and buy any product.
2. Move to checkout page by filling all details and go to payment step
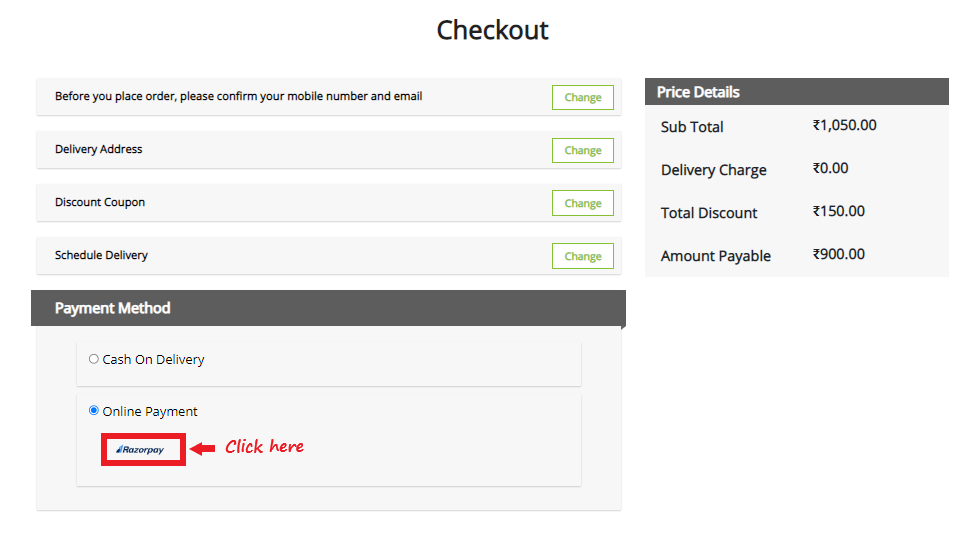
3. You will see the option of Online Payments, below which you can see RazorPay.
4. Complete the test payment and similar will be reflected in your razorpay account.
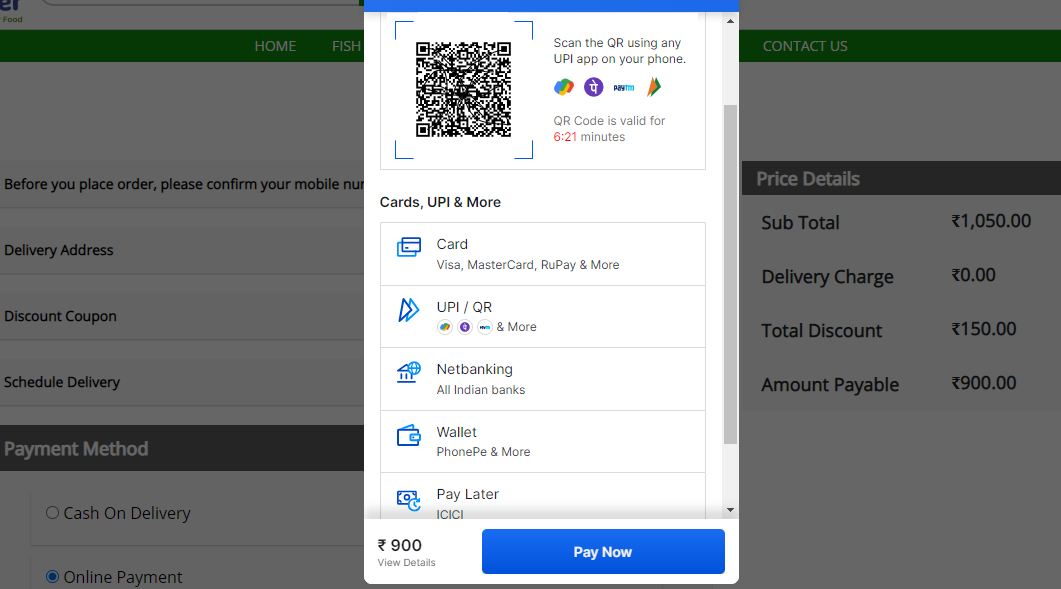
5. Login into your Razorpay account and check the transaction details.