SetUp RazorPay Payment Gateway for your MoreCustomersApp Online Store

As online business and activities boomed in recent years, online payments have become a significant part of the e-commerce industry. We no longer use only credit or debit cards to make online payments. Now there are payment gateways that support multiple payment options like Net Banking, Digital Wallet, Cards, Payment Wallet, etc to have online transactions. Earlier we have posted a Blog on Why RazorPay important for our eCommerce Store. Knowing the importance Enable the Razorpay Payment gateway and allow your customers to make Online Payments on your MoreCustomersApp eCommerce Store.
Follow the below steps To enable the Razorpay payment gateway on your MoreCustomersApp Online Store
Step 1: Create an account on Razorpay https://razorpay.com/
Step 2: Log in with your user name and password in https://dashboard.razorpay.com/#/access/signin
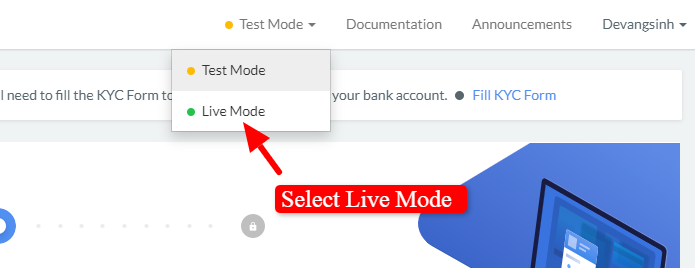
Step 3: Change your account type ‘Test Mode’ on the top right corner to ‘Live Mode’.
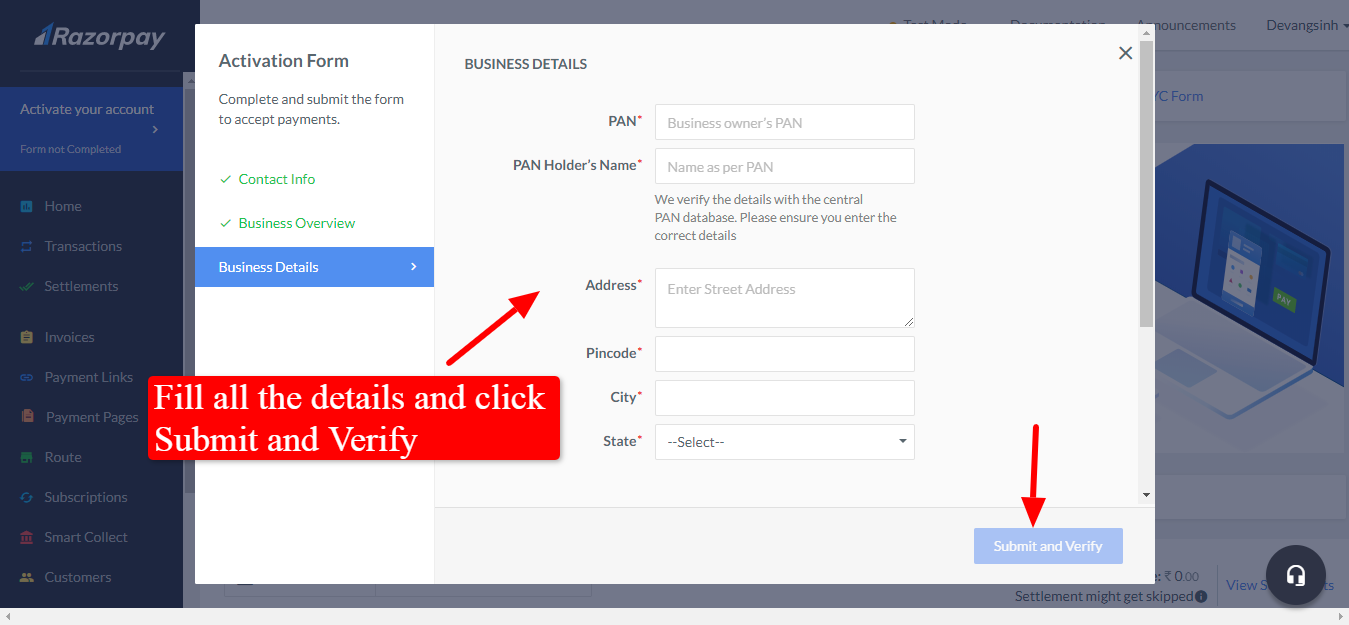
Step 4: Fill in the Activation Form. Add all details as asked like PAN number, Holders Name, Address. See the below screenshot.
Step 5: After account verification, click on the Setting option from the left menu see the below screenshot.
Note: It takes 4-5 business days for account verification depending upon their terms and condition. Kindly read their policies

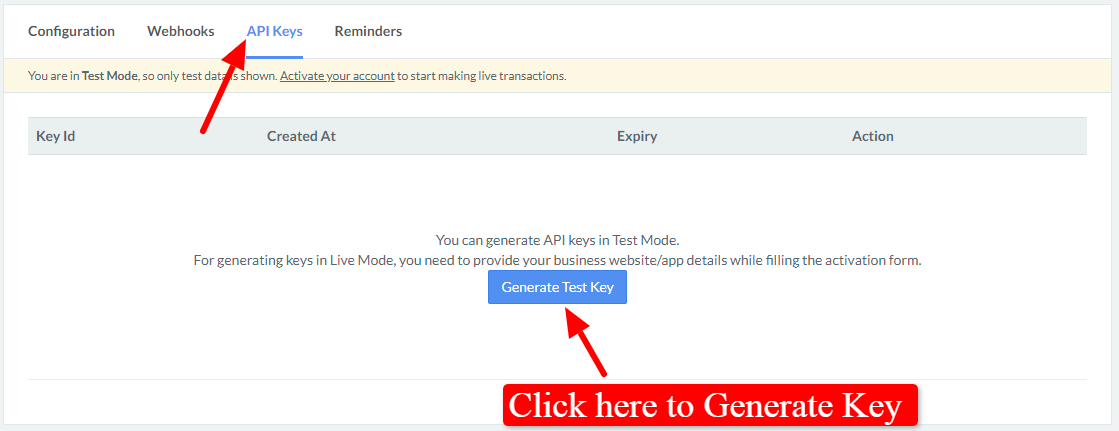
Step 6: Now, click on the API Keys from the top header and click on the button “Generate Key”
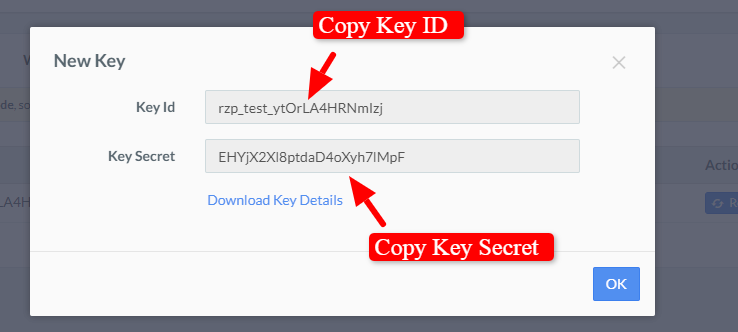
Step 7: Once you Generate the Key then it will show one popup where you can see the Key ID and Key Secret. Copy them
Step 8: Paste Key ID and Key Secret ID on your MoreCustomersApp Razorpay Plugin Page.
Note: You must have to Purchase the plugin or upgrade your subscription to allow you to add KeyID and KeySecret ID.

Step 9: Click on the Save button.
Your Razor Payment Gateway is successfully activated. Now your customers can see the RazorPay payment option under the Online Payment section when they checkout.
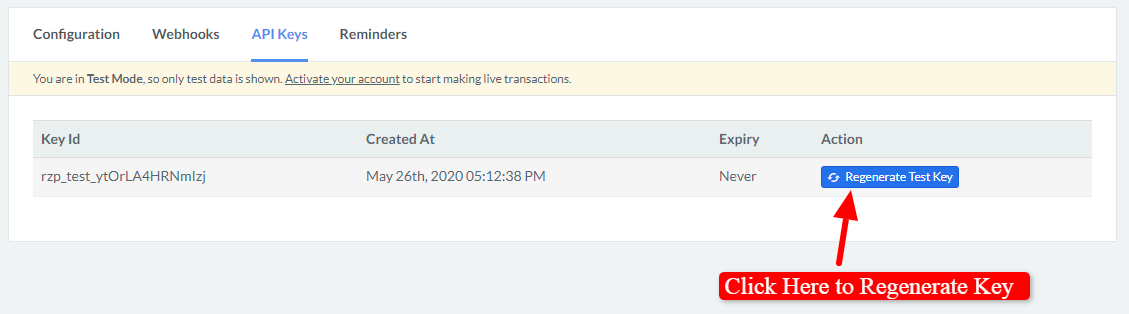
Additional Steps To Regenerate Key:
In case you want to Regenerate Key, it can be done easily Click on the Regenerate Key button in the list from where you can regenerate it again and use the new key ID and Key Secret.
Once you click on the Regenerate option then it will ask you to Deactivate the old key. So select the option accordingly which you want and click on the OK button.
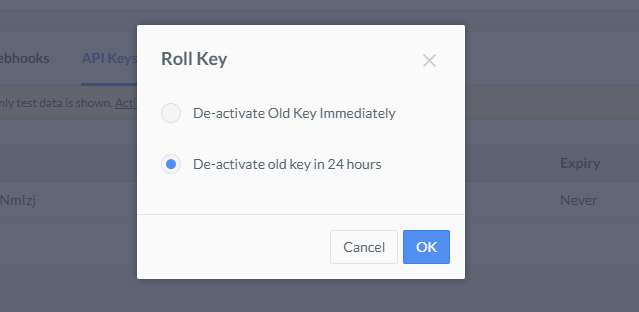
Once saved, it will regenerate the key ID and Key Secret which will appear similar to above in step 7. In the same way, you can regenerate the key and use the new one in our system.
In times of social distancing, online retailers and customers are adhering to Online transactions. Whether it is a small grocery business or a jewelry store, entrepreneurs are opting for Digital Payments on their Webstore. RazorPay is one of the best Payment Gateway for Indian retailers. It also supports multiple currencies to take your business globally too.
If your a MoreCustomersApp Seller Activate your RazorPay PlugIn and avail it benefits