

Facebook Messenger and Online Store

Facebook messenger is one of the most important platforms that need to be integrated with your online store. Facebook Messenger chatbot and Live Chat provide enormous potential to drive sales to your e-commerce store.
Why there is a need for Live Chat for eCommerce Store
First, we will see why you need to live chat for your eCommerce store. The first reason you need a live chat is to increase trust. People are often confused when they are buying from a new store (first-time buyers). Live chat will give them another reason to trust the store. Further, if they want to know something about the product, they can easily ask the live chat with a few clicks.Introduction to FB messenger
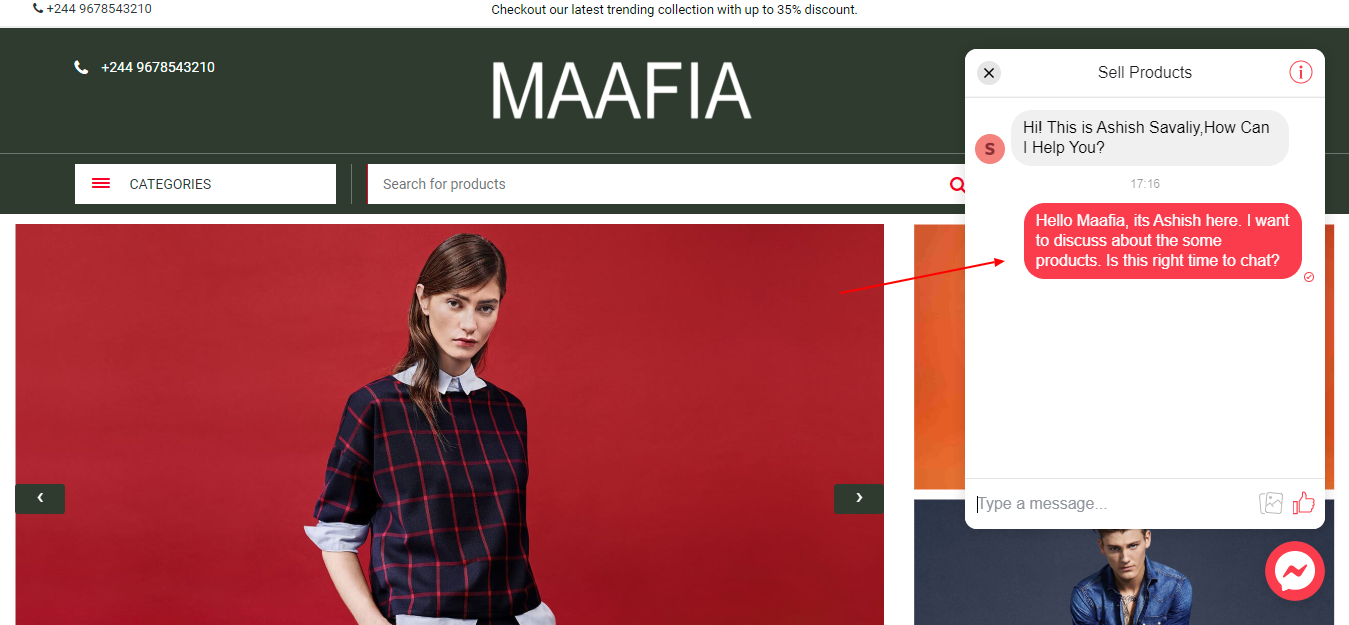
Facebook Messenger is not only to talk with your friends and family, it’s a tool using which you can talk to your potential as well as existing customers. Consumers like the live chat option as it is quick and has a HUMAN touch. They find it helpful and problem-solving. You can integrate FB messenger in your store and this will enhance the user experience and your customer service. You can use it as a live chat or you can use it as a chatbot. We will start with the live chat.How it Works
You don't need to know code. Integrate FaceBook Messenger on your Online Store with Few Clicks. To do that, you will first need a Facebook page. Thereafter, you can follow the below steps.Step1: Find the Facebook page ID
You can find the Facebook page ID by going to the about section of the Facebook page. You will see the numeric ID. You can also use find my bid to find your Facebook page ID.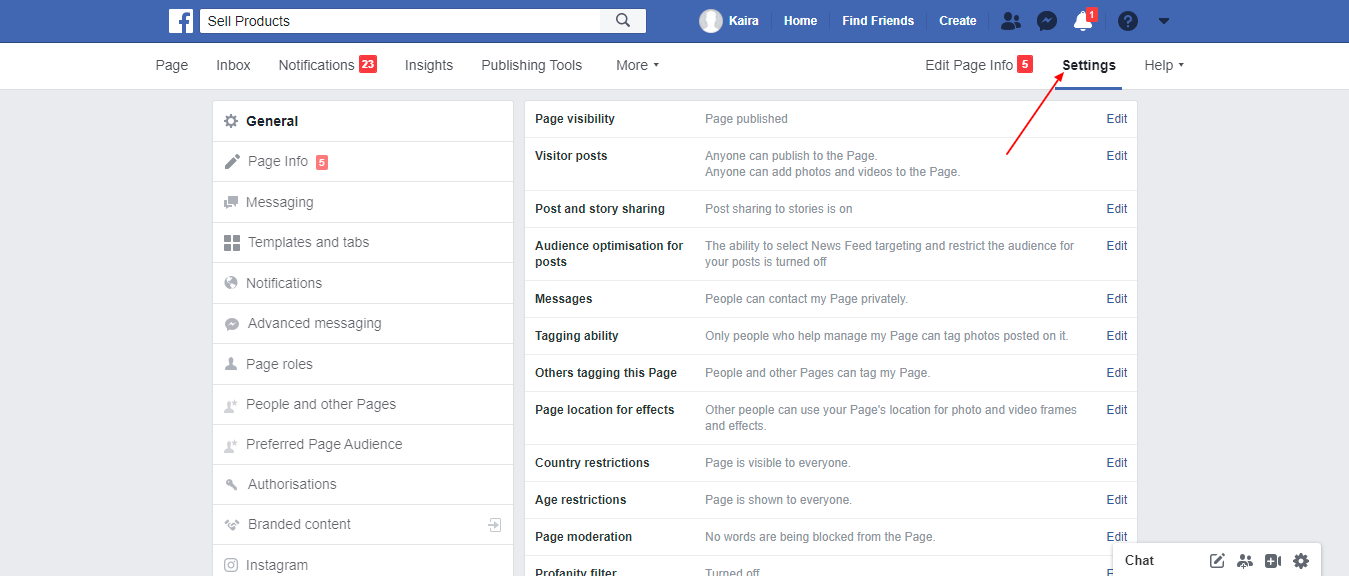
Step 2: White list your Domain
Go to your Facebook page. Click on the settings in the top right section. Inside it, you will see the menu called “Advanced Messenging” on the left side. Click on the button and scroll to the bottom. You will find the section to whitelist the domains. You need to enter your domain here. Make sure you add your domain with HTTPS and HTTP variation too. So, you will add two domains total, one will be http://example.com and the second will be https://example.com. Of course, replace an example with your domain.Step 3: Add the Messenger
 Go to your page settings and click on the messaging menu. Click on the “Add messenger to your website” section.
You will be given various design options. You can customize the chatbox as per your need. Click on next and you will get the code in the end.
Go to your page settings and click on the messaging menu. Click on the “Add messenger to your website” section.
You will be given various design options. You can customize the chatbox as per your need. Click on next and you will get the code in the end.
Step 4: Embed the Code
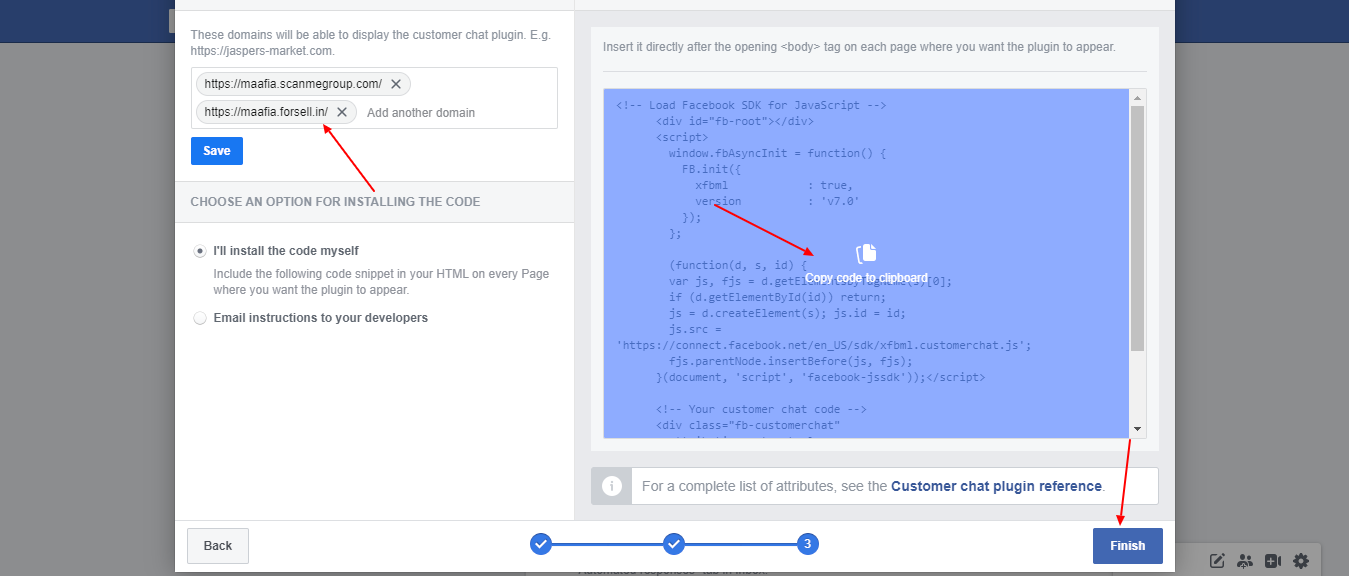 Now, you can embed the code into your website. You can add it anywhere in the body tag. The best place would be to place it right above the </body> tag.
 If you are using any CMS such as WordPress or an eCommerce platform such as MoreCustomersApp, you can easily get a plugin to do this work for you. So, you can use the plugin as well.